认识logstash
原文地址:https://www.douyacun.com/article/8513551c1e6849ebd5b65a52cfc4a8c3
文档
-
logstash最佳实践(只能入门看看):https://doc.yonyoucloud.com/doc/logstash-best-practice-cn/index.html
-
官方文档(看过logstash最佳实践以后,官方文档的大概结构就知道了):https://www.elastic.co/guide/en/logstash/current/index.html
-
filter grok 工具(logstash提供正则匹配工具):http://grokdebug.herokuapp.com/
-
logstash下载地址: https://www.elastic.co/cn/downloads/logstash
定义配置文件
logstash.conf
input {
        file {
                path => "/Users/liuning/Documents/utils/datasets/movies.csv"
                start_position => "beginning"
                sincedb_path => "/dev/null"
        }
}

filter {
        csv {
                separator => ","
                skip_header => true
                columns => ["id","content","genres"]
        }
        mutate {
                split => ["genres", "|"]
                remove_field => ["path", "message", "@timestamp", "host"]
        }
        mutate {
                split => ["content", "("]
                add_field => { "title" => "%{[content][0]}"}
                add_field => { "year" => "%{[content][1]}"}
        }
        mutate {
                convert => {
                        "year" => "integer"
                }
                strip => ["title"]
                remove_field => ["path", "host","@timestamp","message","content"]
        }
}

output {
        elasticsearch {
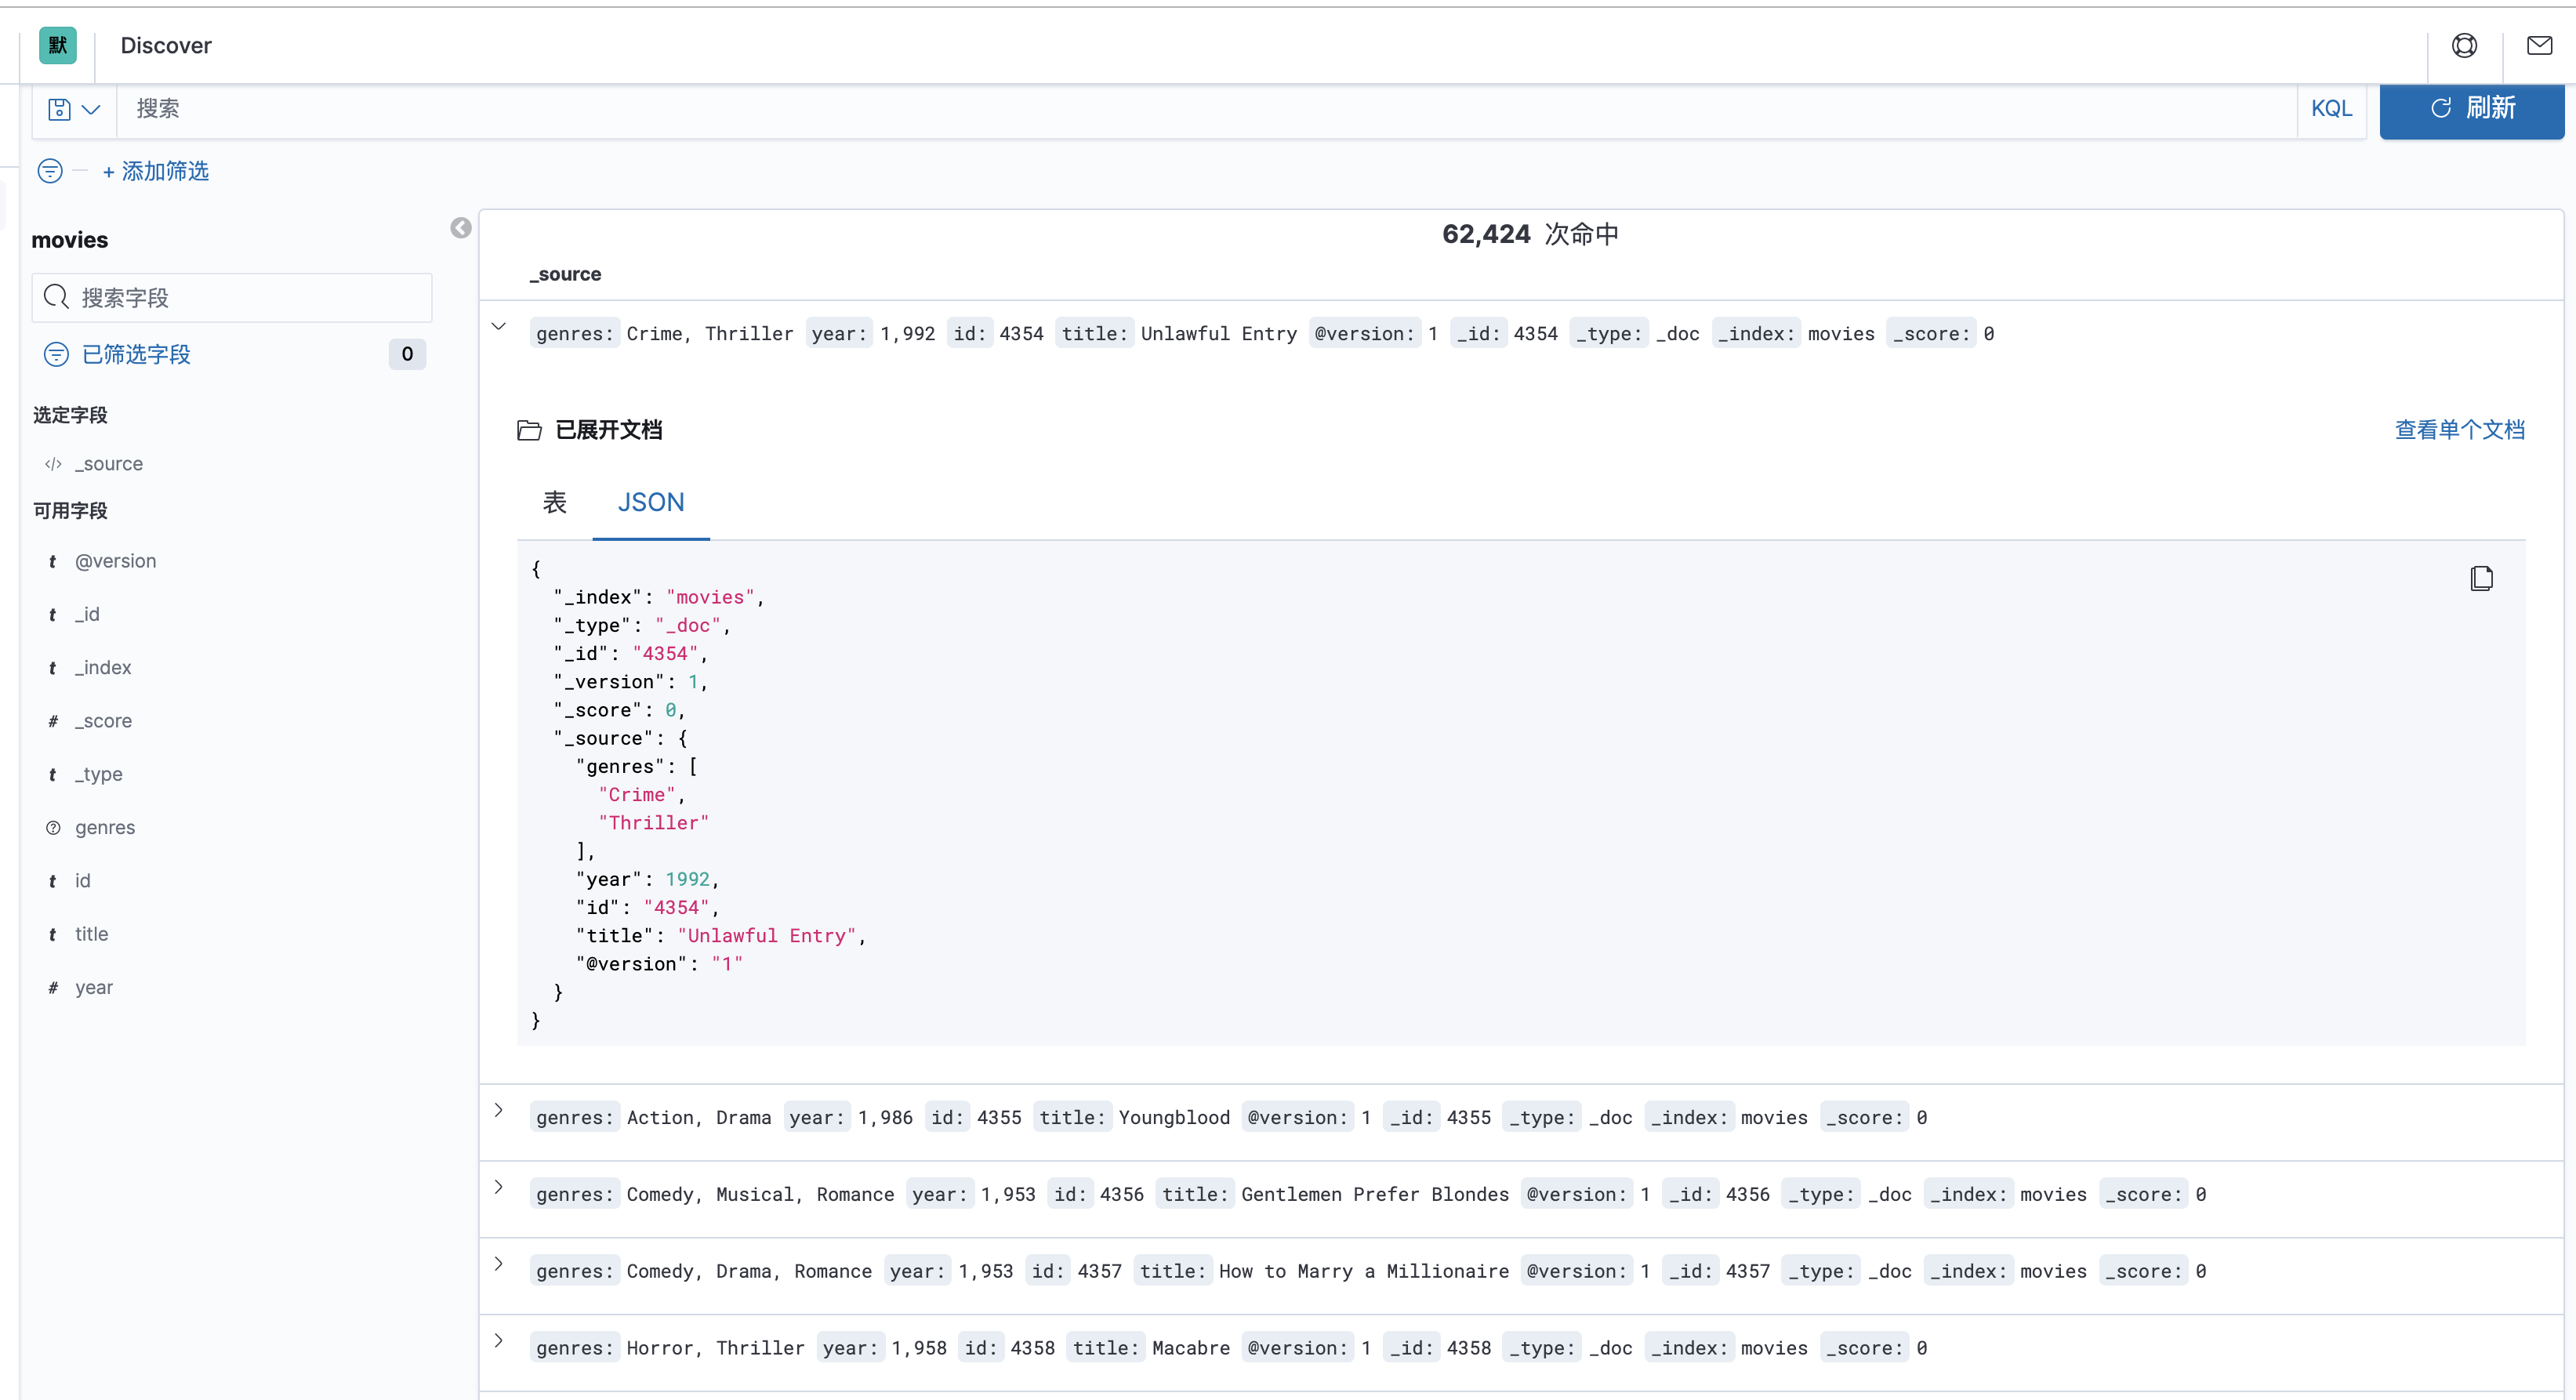
                index => "movies"
                document_id => "%{id}"
        }
        stdout { codec => rubydebug }
}
-
file 读取文件,还支持网络等。
- path:这里会有坑,如果启动后一直不读取数据,估计是路径出了问题,这里不支持中文,
-, 老老实实放到一个简单的路径里,不知道下划线支不支持,自己试试 - start_position:从文件开始的位置读,首次提取数据时,可以这么设置。
- sincedb_path: logstash读取文件后,会记录文件已经读取的位置,重启也会从上次的位置开始,这里让他写入``/dev/null`,就可以每次从头开始方便调试。
- path:这里会有坑,如果启动后一直不读取数据,估计是路径出了问题,这里不支持中文,
-
从grouplens下载datasets是csv格式的,logstash默认值csv解析
- autodetect_column_names: 默认是不自动解析表头
- separator: csv分隔列是用
,默认是,写不写都行 - quota_char:csv 如果某一列有逗号的话,需要带上
"表示引用格式,这里自带的csv插件是支持的。如果有解析错乱的话,不用考虑这个。 - skip_header:跳过表头
-
mutate: 修改数据,添加字段,移除字段等等
- split:分割字段为数据
- remove_field:移除一些没用的字段
- strip:去掉空格, php trim() ,python strip(),golang strings.Trim()
-
output:输出到哪
-
elasticsearch
- index:指定索引
- document_id:指定文档id,否则会默认生成
-
stdout:标准输出到控制台
-
运行
sudo ./bin/logstash -f logstash.conf
这里用sudo,是因为要写入到/dev/null, 需要root权限。
具体 elasticsearch、kibana是如果运行的,看 elasticsearch docker的安装步骤

logstash 同步mysql到elasticsearch
有需求需要把mysql中的数据同步到elasticsearch中, 按照每条记录的更新时间导入数据
安装
看一下logstash已经有的plugins,我当前用的是7.6.0默认已经有了input jdbc了
bin/logstash-plugin list
老版本需要安装插件:
bin/logstash-plugin install logstash-input-jdbc
下在java mysql连接驱动,jdbc_driver_library: 从这里下载最新的版本
配置文件
input {
	jdbc {
		jdbc_validate_connection => true
		jdbc_driver_library => "/opt/driver/mysql-connector-java-5.1.36.jar"
		jdbc_driver_class => "com.mysql.jdbc.Driver"
		jdbc_connection_string => "jdbc:mysql://localhost:3306/videos_t"
		jdbc_user => "root"
		jdbc_password => "123456"
		# 定时器
		schedule => "*/1 * * * * "
		# 记录 sql_last_value 值的类型,支持: number / timestamp
		tracking_column_type => "timestamp"
		# 记录上一次查询是最后的值
		use_column_value => true
		tracking_column => "updated_at"
		# 时区 local 或 utc
		plugin_timezone="local"
		# sql_last_value logstash提供的预定义宏,上一次最后查询列的值,具体那一列由 tracking_column 指定
		statement => "select * from foo where updated_at > :sql_last_value"
		# 分页,防止首次导入的时候数据过多
		jdbc_paging_enabled => "true"
		jdbc_page_size => "10000"
	}
}

filter {
}

output {
	stdout { codec => json_lines }
}
这里的需要是按照更新时间导入数据,需要用到3个配置:
use_column_value: 使用上一次查询的值,作为 sql_last_valuetracking_column: 使用哪一列tracking_column_type: 该列值的类型,numeric,timestamp
如果是只有插入同步到elasticsearch的话,可以按id同步
tracking_column => "id"tracking_column_type => "numeric"
-
statement: sql语句,支持参数绑定的形式 -
prepared_statement_bind_values: 数组,sql中绑定的参数 -
schedule: 定时器,具体看cron的用法 -
plugin_timezone: 按更新时间同步数据的话,一定要注意时区,默认是:utc,支持local和utc。否则每次查询条件都是差8个小时 -
jdbc_paging_enabled: 分页,第一次同步几百万的话,一次查询数据量可能太多 -
jdbc_page_size: 每页条数 -
logstash_jdbc_last_run: 上一次同步的值, 默认在~/.logstash_jdbc_last_run, 这个最后单独配置一下,一张表同步的话还可以,如果是多张的话就会用成同一个文件中的值
错误
这个错误用logstash(7.5.0)报的错,github issue作者提到新版已经修复这个问题所以上面用的版本是7.6.0
com.mysql.jdbc.Driver not loaded. Are you sure you've included the correct jdbc driver in :jdbc_driver_library?