kong基础入门
原文地址:https://www.douyacun.com/article/c720ce55e6f3ee1a0f010d27c839f1e1
本篇文档目的:
- 使用docker或centos7部署一套kong的环境
- 使用kong代理到本地服务
- 熟悉kong限流和鉴权
- 负载均衡
安装
docker、centos7安装
docker
官网 有完整介绍
创建桥接网络,kong和postgres在同一网段中
$ docker network create kong-net
使用postgres存储,这里需要指定密码负责postgres会启动不起来
$ docker run -d --name kong-database \
--network=kong-net \
-p 5432:5432 \
-e "POSTGRES_USER=kong" \
-e "POSTGRES_DB=kong" \
-e "POSTGRES_PASSWORD=kong" \
postgres:9.6
docker ps -a 确认一下是否启动了postgres
初始化数据库
$ docker run --rm \
     --network=kong-net \
     -e "KONG_DATABASE=postgres" \
     -e "KONG_PG_HOST=kong-database" \
     -e "KONG_PG_PASSWORD=kong" \
     -e "KONG_CASSANDRA_CONTACT_POINTS=kong-database" \
     kong:latest kong migrations bootstrap
启动kong
$ docker run -d --name kong \
     --network=kong-net \
     -e "KONG_DATABASE=postgres" \
     -e "KONG_PG_HOST=kong-database" \
     -e "KONG_PG_PASSWORD=kong" \
     -e "KONG_CASSANDRA_CONTACT_POINTS=kong-database" \
     -e "KONG_PROXY_ACCESS_LOG=/dev/stdout" \
     -e "KONG_ADMIN_ACCESS_LOG=/dev/stdout" \
     -e "KONG_PROXY_ERROR_LOG=/dev/stderr" \
     -e "KONG_ADMIN_ERROR_LOG=/dev/stderr" \
     -e "KONG_ADMIN_LISTEN=0.0.0.0:8001, 0.0.0.0:8444 ssl" \
     -p 8000:8000 \
     -p 8443:8443 \
     -p 127.0.0.1:8001:8001 \
     -p 127.0.0.1:8444:8444 \
     kong:latest
查看空是否启动成功:
$ curl -i http://localhost:8001/
安装kong管理界面:
$ docker run -d -p 1337:1337 \
             --network kong-net \
             --name konga \
             -e "NODE_ENV=production" \
             -e "TOKEN_SECRET=kong" \
             pantsel/konga
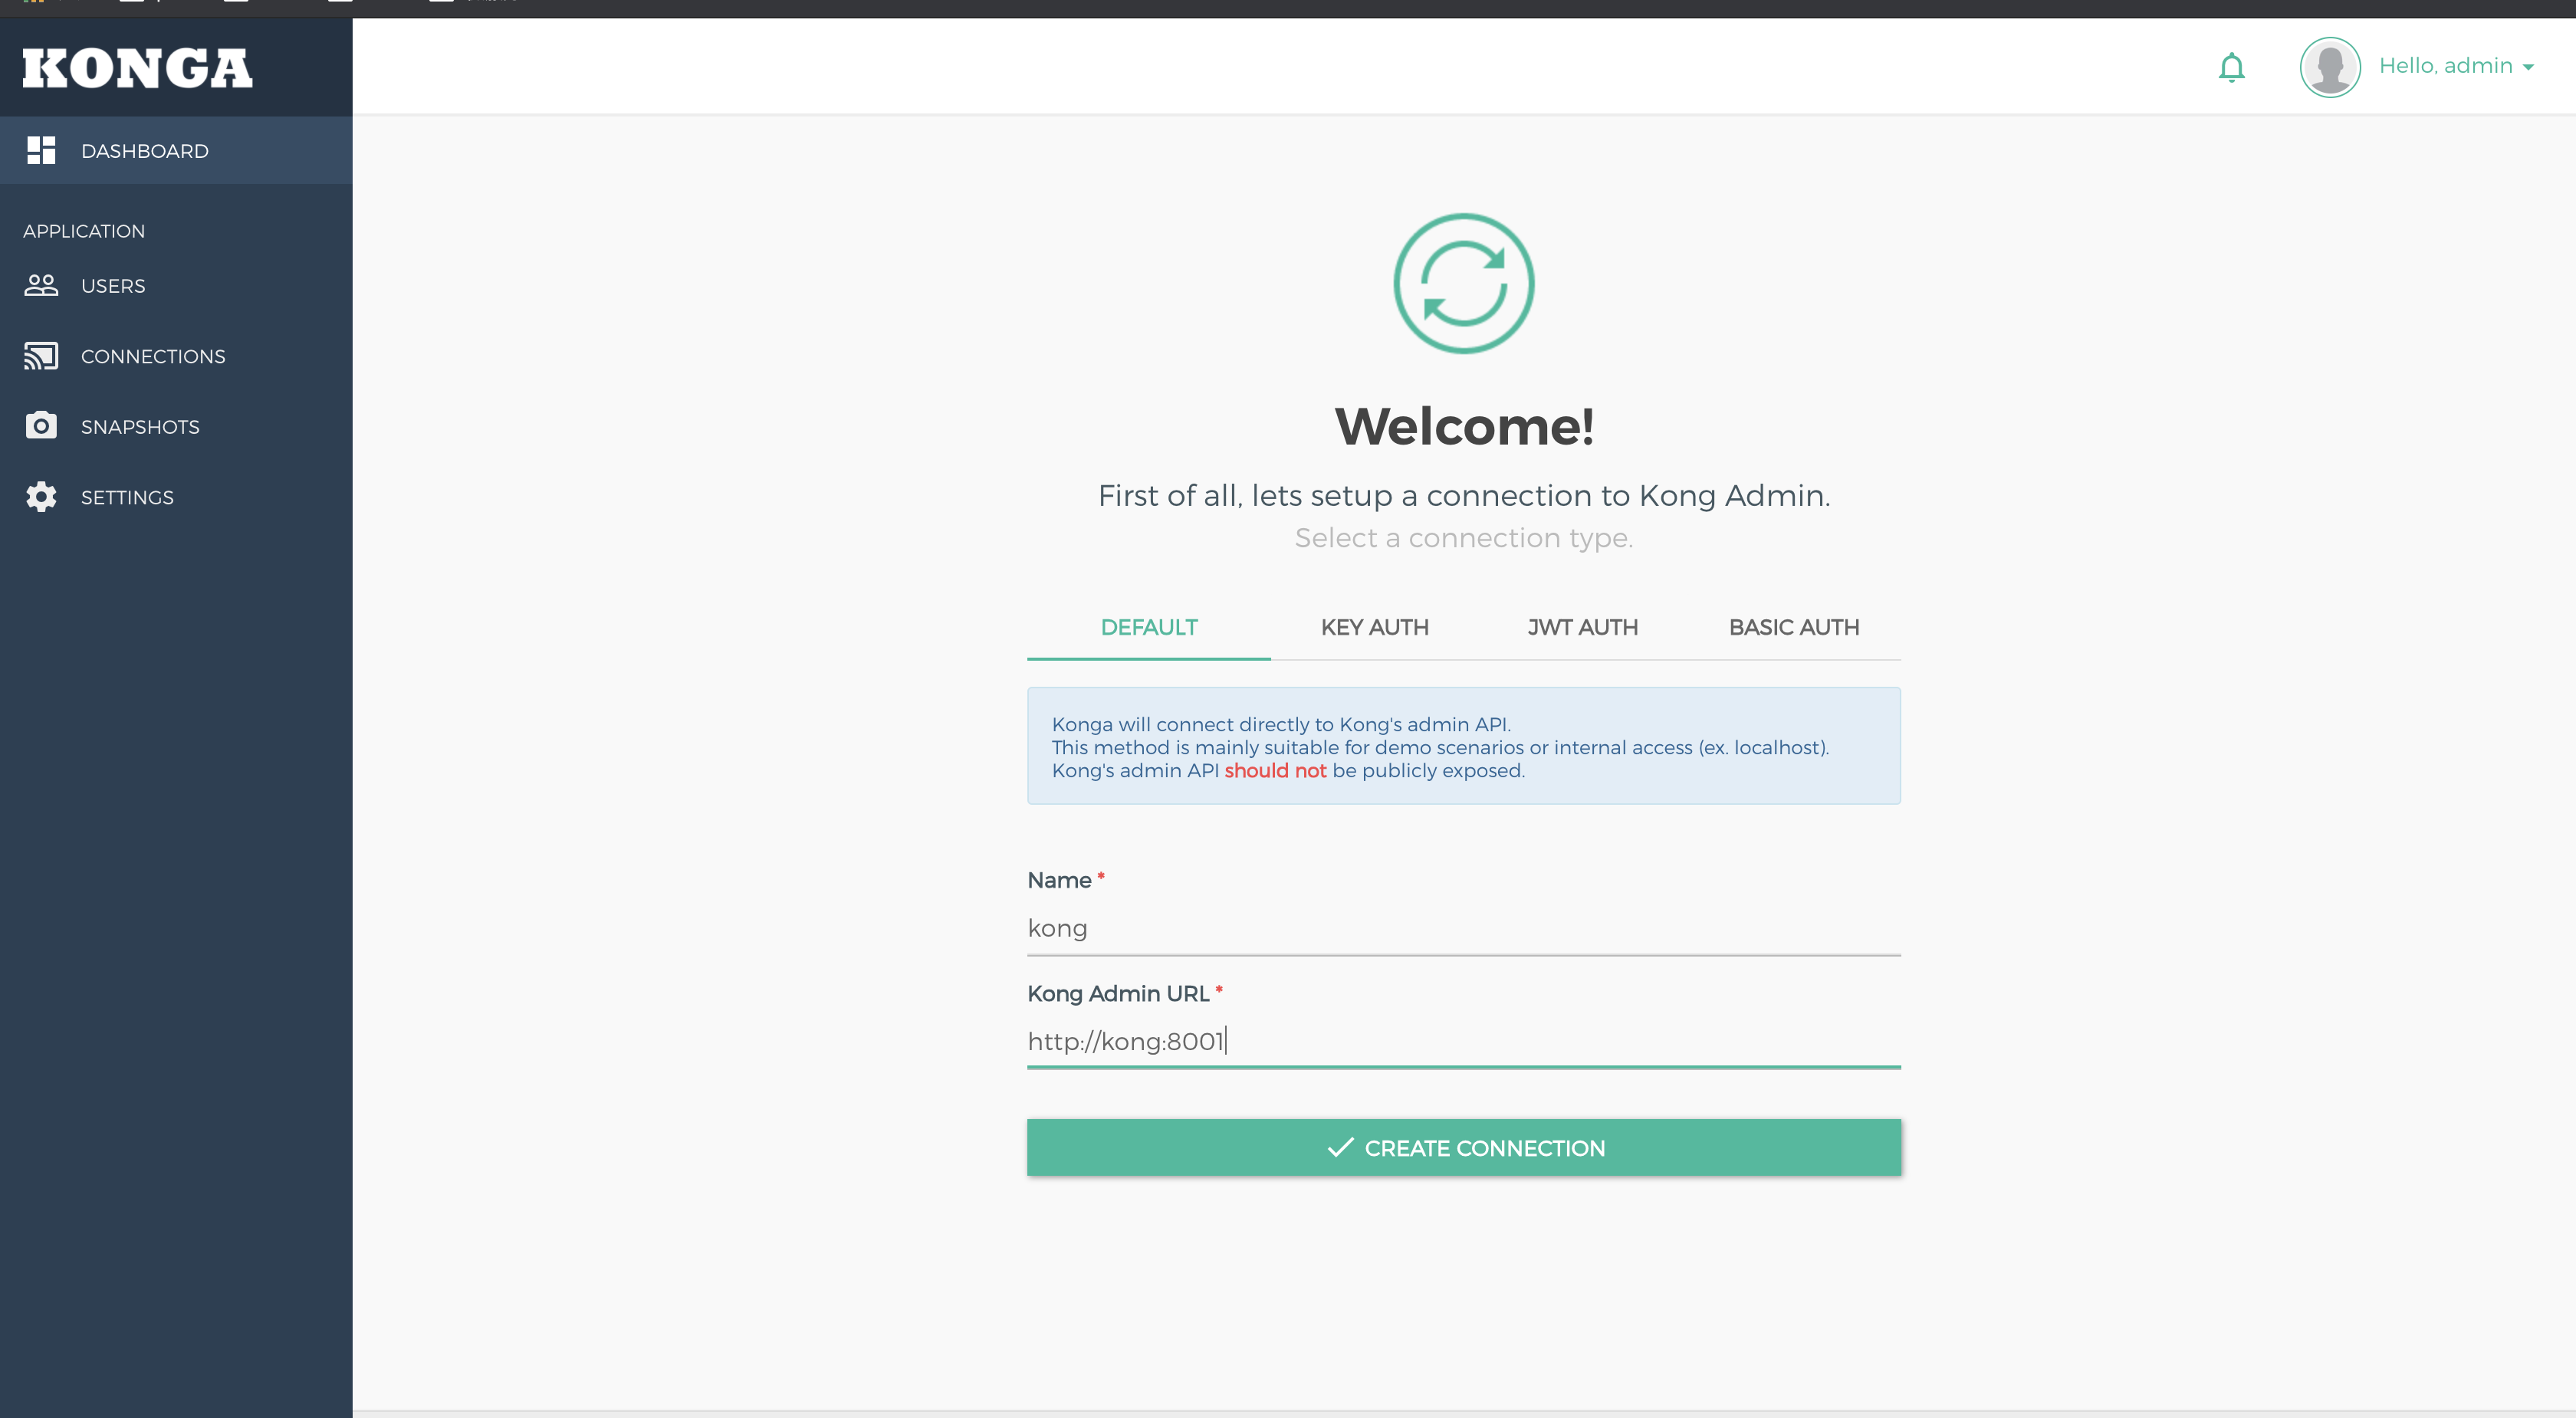
配置konga,连接kong,因为在同一个网络可以使用容器name做为host连接容器
centos 7
安装PostgreSQL
yum 安装
安装步骤官网较全
https://www.postgresql.org/download/linux/redhat/
$ yum install -y postgresql10-server postgresql10 postgresql10-contrib
初始化数据库
$ /usr/pgsql-10/bin/postgresql-10-setup initdb
启动数据库
$ systemctl enable postgresql-10.service
允许远程连接
/var/lib/pgsql/10/data/postgresql.conf
$ listen_addresses = '0.0.0.0'
连接验证
/var/lib/pgsql/10/data/pg_hba.conf
# TYPE  DATABASE        USER            ADDRESS                 METHOD
host    all             all             127.0.0.1/32            trust
# "local" is for Unix domain socket connections only
local   all             all                                     peer
# IPv4 local connections:
host    all             all             127.0.0.1/32            ident
# IPv6 local connections:
host    all             all             ::1/128                 ident
# Allow replication connections from localhost, by a user with the
# replication privilege.
local   replication     all                                     peer
host    replication     all             127.0.0.1/32            ident
host    replication     all             ::1/128                 ident
host    all             all             0.0.0.0/0               trust
注意放在最上面,否则本地连接的话会优先命中
host replication all 127.0.0.1/32 ident
Ident authentication failed for user "kong"
安装kong
yum安装
$ sudo wget -O kong-2.0.4.el7.amd64.rpm https://bintray.com/kong/kong-rpm/download_file?file_path=centos/7/kong-2.0.4.el7.amd64.rpm
$ sudo yum install kong-2.0.4.el7.amd64.rpm
$ kong -h
创建数据库
$ sudo -u postgres psql
 CREATE USER kong;
 CREATE DATABASE kong OWNER kong;
 \du;
常用命令
\password           设置密码。
\q                  退出。
\h                  查看SQL命令的解释,比如\h select。
\?                  查看psql命令列表。
\l                  列出所有数据库。
\c [database_name]  连接其他数据库。
\d                  列出当前数据库的所有表格。
\d [table_name]     列出某一张表格的结构。
\du                 列出所有用户。
\e                  打开文本编辑器。
\conninfo           列出当前数据库和连接的信息。
配置文件
/etc/kong/kong.conf
database = postgres
pg_host = 127.0.0.1
pg_port = 5432
pg_user = kong
pg_database = kong
proxy_listen = 0.0.0.0:80
declarative_config = /etc/kong/kong.yml
迁移数据库
kong migrations bootstrap -c /etc/kong/kong.conf
概念
架构图
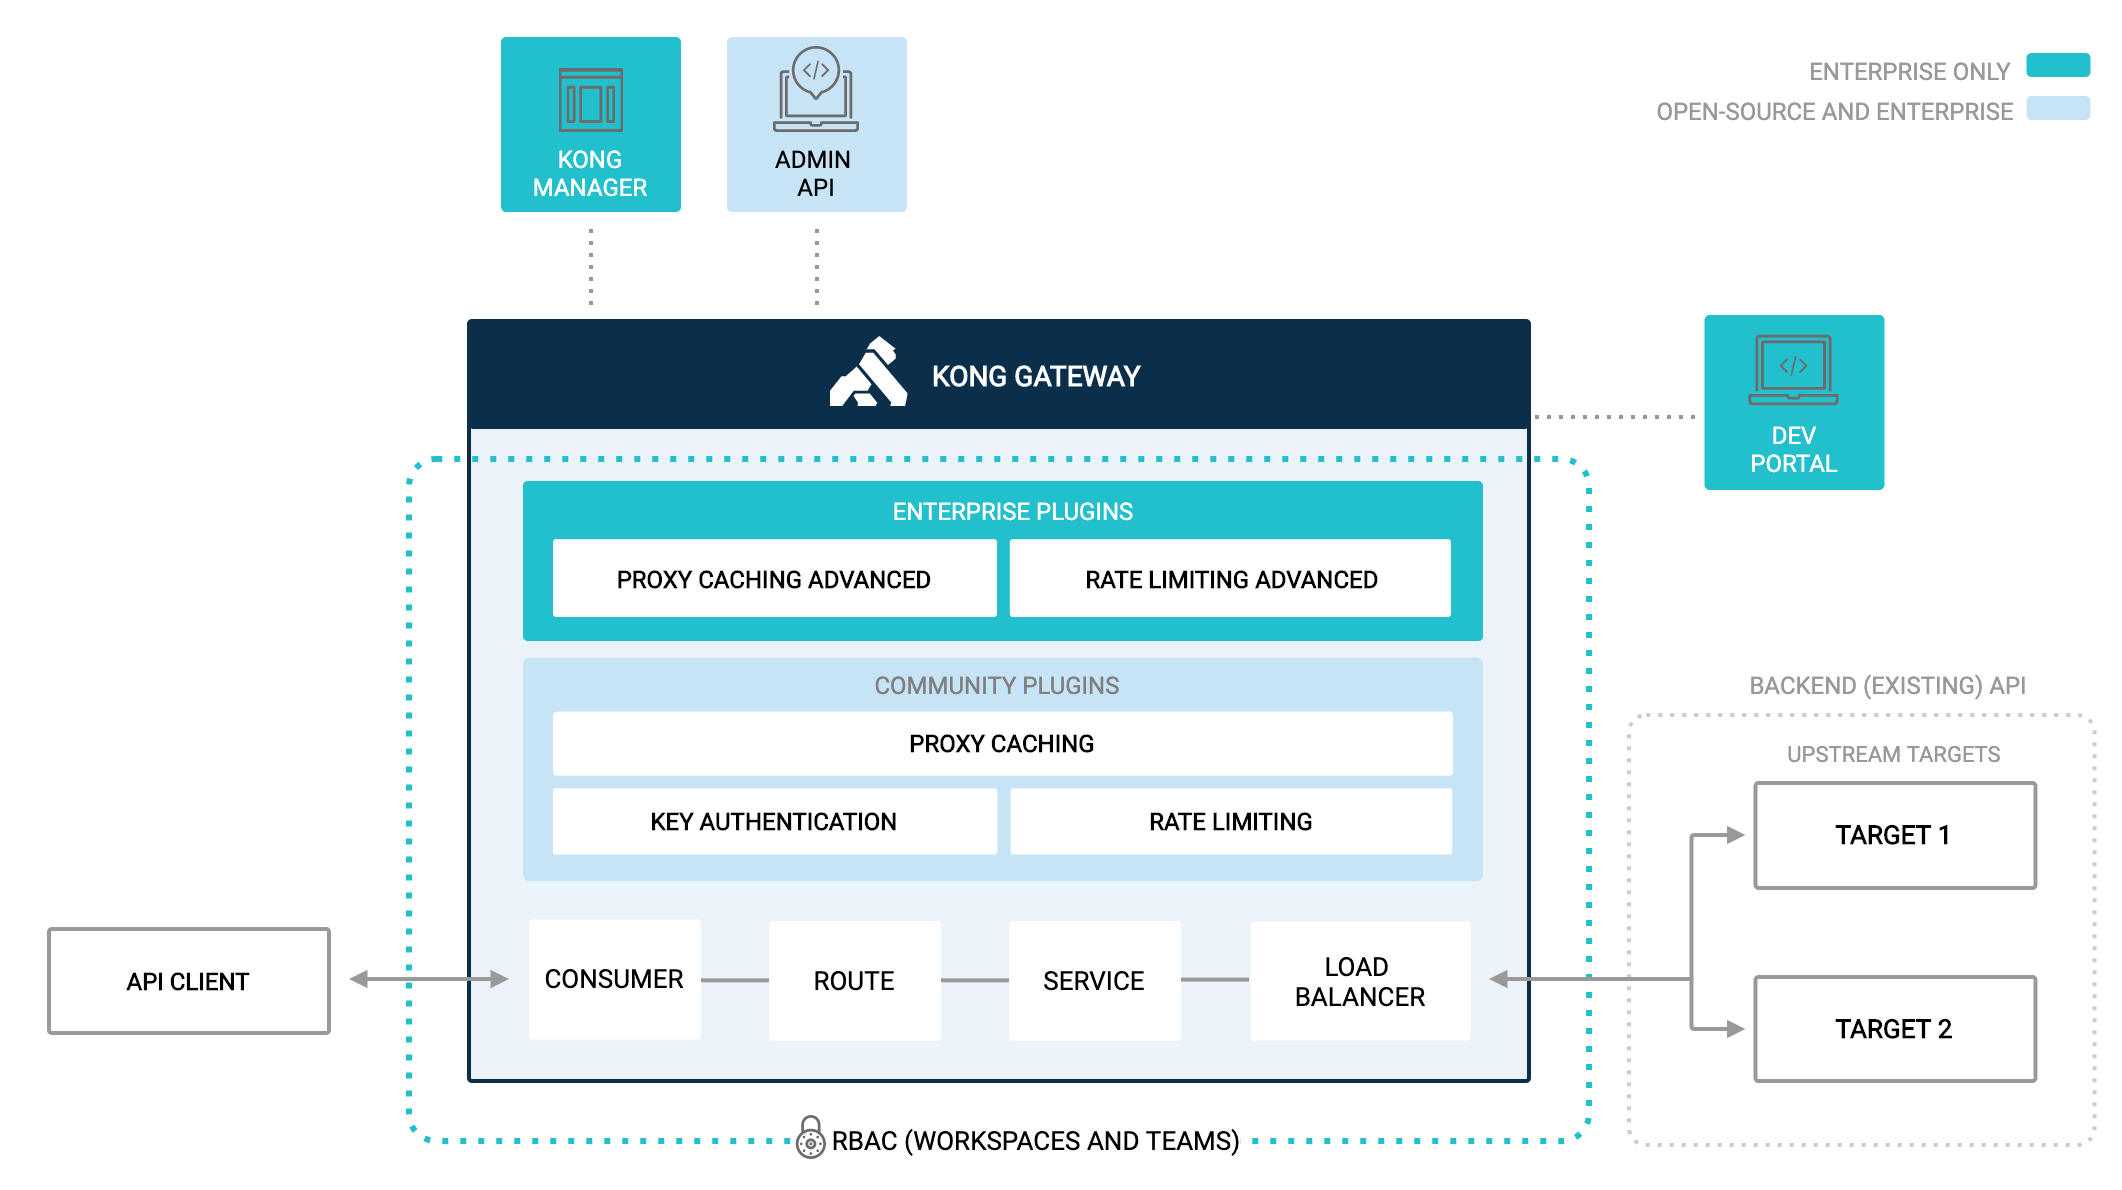
| Concept/Feature | Description |
|---|---|
| Service | 多个 Upstream 的集合,是 Route 的转发目标 |
| Routes | 求的转发规则,按照 Hostname 和 PATH,将请求转发给 Service |
| Consumers | API 的用户,记录用户信息 |
| REST API | 通过 REST API 进行配置管理,从繁琐的配置文件中解放 |
| 插件 | 提供众多开箱即用的插件,且有易于扩展的自定义插件接口,可以使用 Lua 自行开发插件 |
| 限流 | 可以通过插件实现单个服务某些接口的限流,避免服务过载导致不可用 |
| 鉴权 | 权限控制,IP 黑白名单,同样是 OpenResty 的特性 |
| 负载均衡 | Kong Gateway provides two methods for load balancing: straightforward DNS-based or using a ring-balancer. In this guide, you’ll use a ring-balancer, which requires configuring upstream and target entities. With this method, the adding and removing of backend services is handled by Kong Gateway, and no DNS updates are necessary. |
为什么用kong?
- 统一入口:服务端微服务框架中,接口权限验证,IP 限制,限流等在各个服务中都单独实现。没有统一入口,不方便统一管理。
- 易用性,扩展性:服务端技术栈主要是LNMP开发,目前在逐步转型到基于golang微服务技术栈上开发。这是一个灰度迁移的过程,我们需要Proxy能操作简单,管理方便。
- 持续集成发布:互联网 2C 产品,用户无时不刻不在使用服务,同时产品还在不断的迭代,服务每时每刻都可以发布,所以必须要热部署能力,并且是自动化的。支持灰度发布,具有故障转移能力
kong网关提供服务
kong承担的是网关层,可以当作中间件来看待
service: 代表后端api服务
route: 路由到哪个service服务,一个service可以有多个route
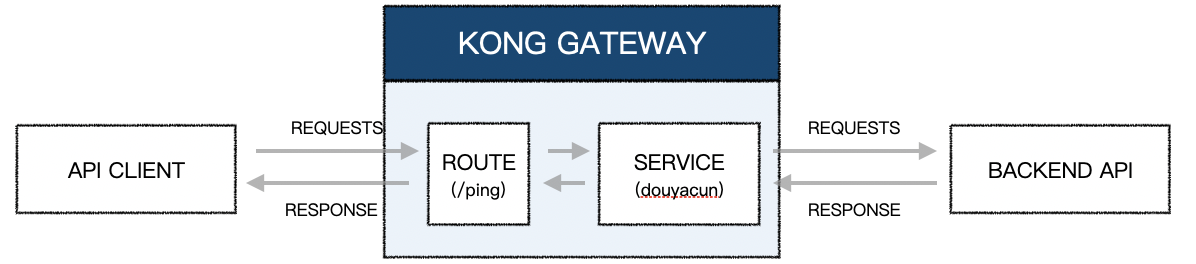
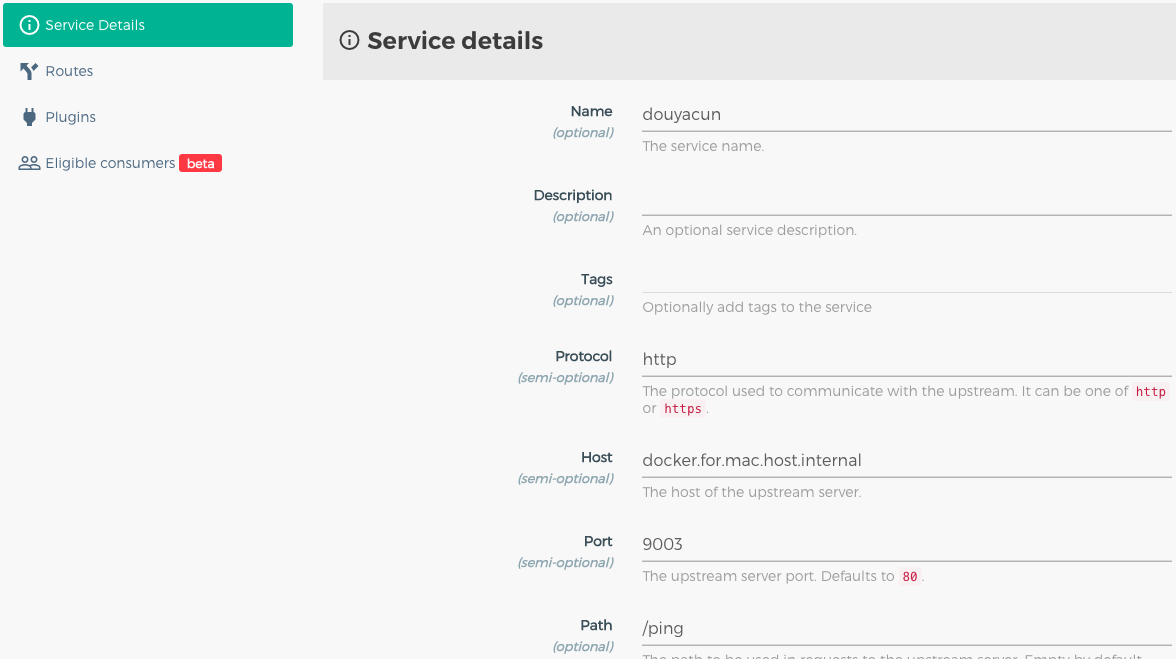
创建service
rest api
$ curl -i -X POST http://localhost:8001/services \
 --data name=douyacun \
 --data url='http://docker.for.mac.host.internal:9003'
界面
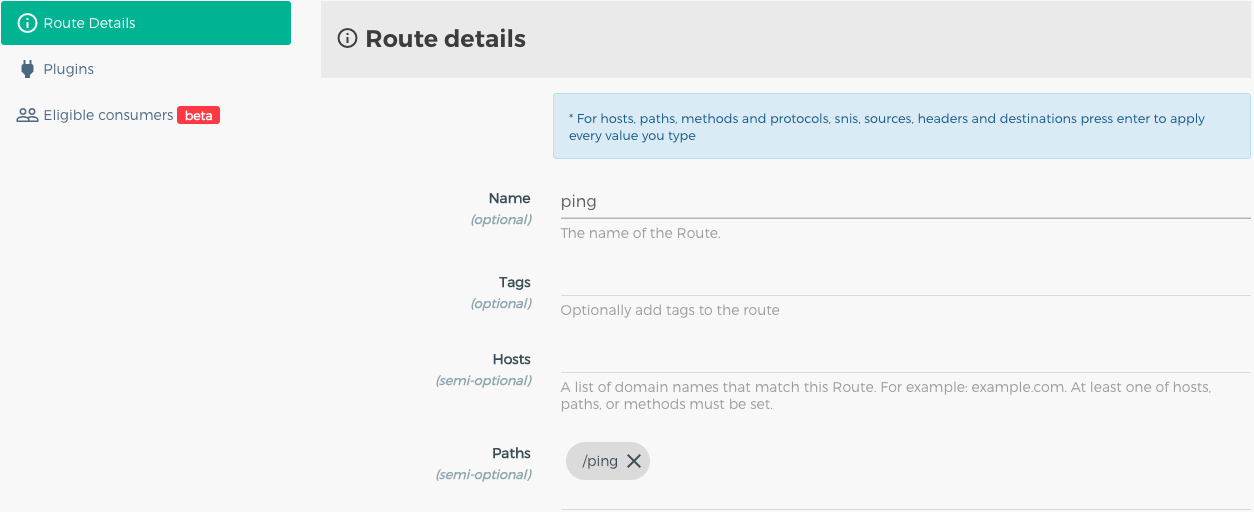
创建route
rest api
$ curl --location --request POST '127.0.0.1:8001/services/douyacun/routes' \
--form 'name=ping' \
--form 'paths[]=/ping'
界面
访问:
curl --location --request GET '127.0.0.1:8000/ping'
# ok
限流配置
rest api 这样设置,默认是全局配置, 默认是针对consumer,每分钟5次
$ curl -i -X POST http://localhost:8001/plugins \
--data "name=rate-limiting" \
--data "config.minute=5" \
--data "config.policy=local"
界面

超过5次以后会返回
{
    "message": "API rate limit exceeded"
}
proxy_cache 缓存请求插件
rest api
$ curl -i -X POST http://127.0.0.1:8001/plugins \
--data name=proxy-cache \
--data config.content_type="application/json" \
--data config.cache_ttl=30 \
--data config.strategy=memory
界面
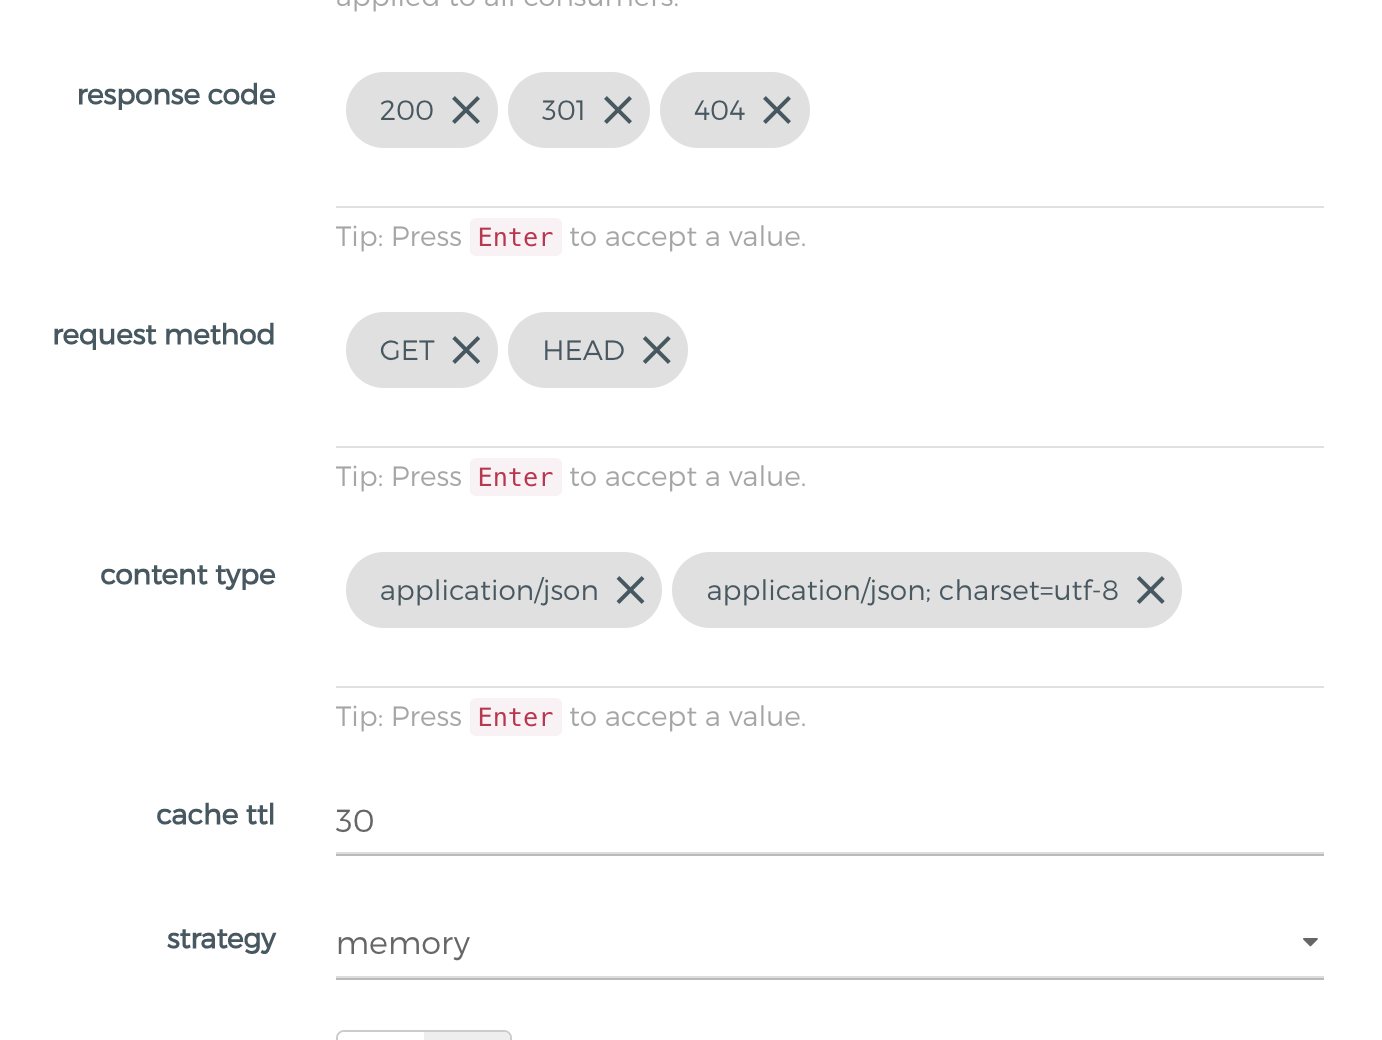
注意: 如果content-type 不一致的话,缓存命中状态会是跳过状态X-Cache-Status: Bypass ,像我们上面设置的 config.content_type="application/json" 但是response content-type是 application/json; charset=utf-8
key-auth 鉴权
添加key-auth插件
$ curl -X POST http://127.0.0.1:8001/routes/douyacun/plugins \
 --data name=key-auth
添加consumer和Credentials
$ curl -i -X POST -d "username=douyacun&custom_id=douyacun" http://localhost:8001/consumers/
为consumer生成apikey
$ curl -i -X POST http://localhost:8001/consumers/douyacun/key-auth -d 'key=ASF-JIK-0O1'
验证
$ curl -i http://localhost:8000/api/articles -H 'apikey:ASF-JIK-0O1'
负载均衡
创建Upstream
curl -X POST http://127.0.0.1:8001/upstreams \
 --data name=upstream
修改之前创建的douyacun service
curl -X PATCH http://127.0.0.1:8001/services/douyacun \
 --data host='upstream'
增加两个后端节点
$ curl -X POST http://127.0.0.1:8001/upstreams/upstream/targets \
 --data target=’docker.for.mac.host.internal:9004’

$ curl -X POST http://127.0.0.1:8001/upstreams/upstream/targets \
 --data target=’docker.for.mac.host.internal:9003’